Speaking of mini albums. . .This month Kristin Perez also created a mini album, using her Smaller than a Breadbox September kit (the Simple Stories line). Today she brings you the "how-to's" to creating one for yourself.
Hello Apron Strings lovers!
I wanted to share with you a mini album tutorial. I learned how to make this fun, fast and fabulous little album at the My Sketch World crop that I went to over the summer. Nicole Wise led the how to and I wanted to pass on the instructions to you!
I made an album of the pictures I took of KIDFISH, a fishing tournament, my daughters and husband participate in every year. I used the Simple Stories paper, cardstock and embellishments in the September Smaller Than a Breadbox kit.
Here are two pictures of the album -
I made an album of the pictures I took of KIDFISH, a fishing tournament, my daughters and husband participate in every year. I used the Simple Stories paper, cardstock and embellishments in the September Smaller Than a Breadbox kit.
Here are two pictures of the album -

And now the tutorial!
*********
Materials:
2 Pieces of 12X12 Cardstock
1 Piece of 12X12 Pattern Paper
Adhesive
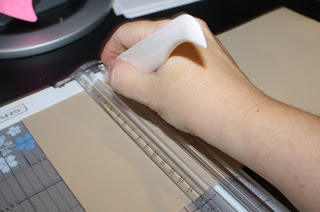
Score board (or ruler and something to score with) I use my paper trimmer and a bone folder!
Cuts:
1 - 6X12” (base - cardstock)
1 - 6X12” (base - cardstock)
3 - 5 ¾ X 12” (base - cardstock)
2 - 5 ½” Squares (accent - pattern paper)
1 - 5” by 12” (accent - pattern paper)
Score:
All three 5 3/4” X 12” pieces at 3” and 9”. These pieces will be (A).
All three 5 3/4” X 12” pieces at 3” and 9”. These pieces will be (A).
The 6” x 12” piece at 2 ¾” and 3” then 9” and 9 ¼”. This piece will be (B).
The 5” x 12” piece at 5” and 8 1/2”. This piece will be ( C).
Fold the score lines.
Assemble and Adhere:
Two of the A pieces together at the small flaps.
Two of the A pieces together at the small flaps.
Then the third A piece together to the others.
(close all flaps and fold book closed)
Now add adhesive to the middle section of the (B) piece and adhere the (A) pieces.
Add a 5 1/2" square to one of the front flaps. ONLY GLUE ON 1/3rd!!!!
Add the other square to the other flap so that the two squares line up together.
Open the book and put piece (C) into the middle so it folds out.
Fold it back up and you have your very own fun, fast and fabulous mini album.
Thank you for looking!
No Kristin, thank you!! Awesome.
Happy Tuesday,


1 comment:
Thank you for a great tutorial. I will post my design on my blog next week, if you would like to check it out. I'm still working on it.Thanks again.
Blessings Renate
Post a Comment