Today, I bring you Sous Chef Kristin Perez, aka Queen of the Altered Items from your Apron Strings Kits. Kind of a long title and probably won't fit on her business cards. She'd never get it all out when she answers the phone either. And her siggy line - forget about it. Still, though, she rocks the altered items with her kits. Kristin has put together the following tutorial for a mini album, using the October Afternoon Farm Girl line from the August Bigger than a Breadbox kit. I love minis and their instant gratification. Enjoy.
I was beyond excited to see October Afternoon's Farm Girl line in the August Bigger Than A Bread Box kit! I have been wanting this paper since I first saw the sneak peeks and I knew that if I was patient Lori would put it in a kit! And she did!
I have a confession - I hoard collect October Afternoon and did not want this so, so cute paper to go in an album to not be seen everyday soooo I made a mini album!
I gathered my supplies - the August kit, a 70 cent board book (sorry Cinderella and your glamour!), and a chipboard mason jar from a previous Apron Strings kit (the April Bigger than a Breadbox kit). Also glue, a filing set, small scissors and a pencil.

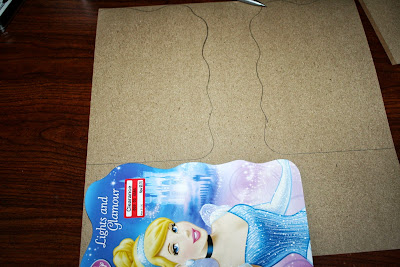
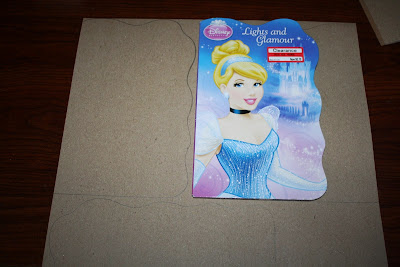
I started by tracing the book on my card stock. The book fit on the cardstock twice but that would not give me enough pages to cover all of Cinderella's glamour so. . .

I traced half of the book on the bottom of the cardstock and the other half in between the two whole pages at the top.

I adhered a ribbon around the book first then layered paper, chipboard, tin pins and
stickers to the front. Note -
because this book was not intended for scrapbooking - adding paper and photos
makes it tight at the spine and makes it so it won't close all the way (the
reason for the ribbon.)

I used Scor Tape and a UHU glue stick to adhere the paper to the front of
the book. ModPodge did not work really well for this - it made for a soggy mess! I usually find
something to scrape my book after it's adhered to make sure the paper is really
stuck on there (I used a Basic Grey rub on tool - a brayer would also
work)
After the paper is glued, cut off the excess (for this book you will have
excess because there is the curved shape at the top) I just use
scissors for this - the cutting doesn't have to be perfect you will fix any
jagged edges in the next step:

Sand down the edges so they are smooth - I used the Basic Grey sanding
tools. (A simple emery board works well too.)

Cover the inside pages and back cover with paper. On the inside pages leave
a little space at the spine so the book won't have trouble closing.
When all your pages are glued and sanded cut a piece for the spine that is
as long as the book and maybe 3 inches or so wide (depending on your book). Wrap
around the spine and adhere (I used two sided tape.)
Ink edges of all the pages with distress ink. This will
cover up any spots you sanded too much as well as add some extra color.
Then embellish! I had the most fun with the titles - using the tin pins, tickets and seed packets to make for fun titles.

Thank you for stopping by to see my picture heavy post today. And I want to say thank you to Amory (my seven year old) who took the pictures of my hands working (and my messy desk!)
~ Kristin
No, THANK YOU, Kristin for the great tutorial. I too loved this line - but then I'm kind of addicted to a fan of October Afternoon. We'll have to compare "collections" some time. ;)
Happy Thursday,


No comments:
Post a Comment