I know. Creative, huh? I'm sure you're thinking, "Whoa, slow down. You are blowing our minds with your creative endeavors." I wish.
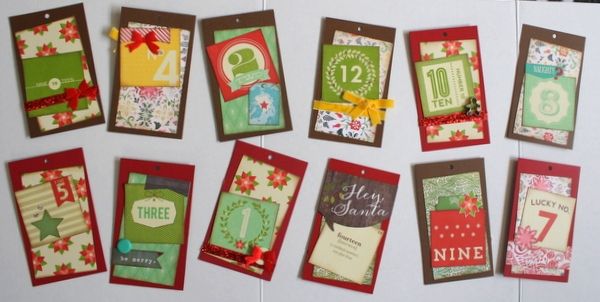
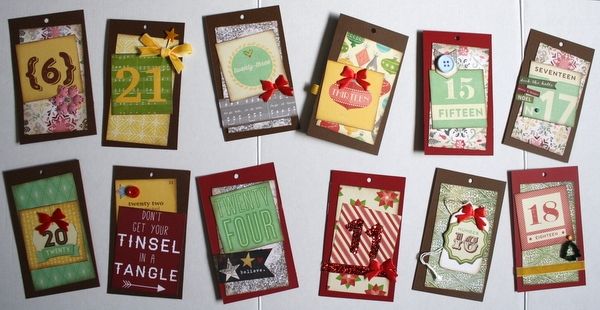
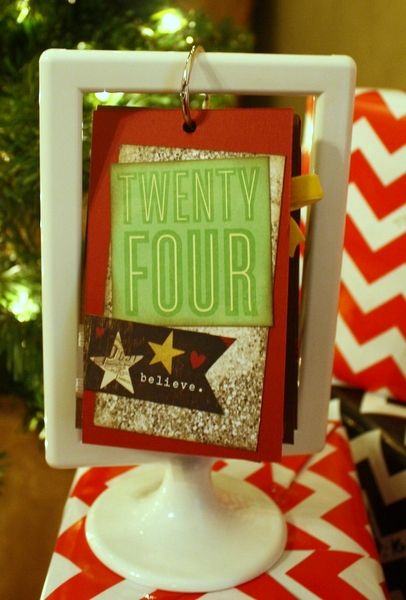
You know who's always got her creative on? Kristin Perez. Last month she created this adorable Countdown calendar, using the December Bigger kit.
Now, don't go thinking, "Fat lot of good that does me now," because you can, 1) use the kit to make your own for next year, or 2) use the idea to create a countdown for a different event. There are countdown calendars for all kinds of things these days: Birthdays, other holidays (Easter, Halloween), even big trips or vacations. Maybe you've adopted a fitness program - are you running every day for 30 days? Maybe your training for a 5k, 10k, half or full marathon. Are you trying to eat better - healthy eating for 30 days? Make a countdown that is not only a physical reminder of your upcoming plans, but helps you track where you're at.
She started by using cardstock from the kit to create the base, then cut down the patterned paper to fit inside. Now, she used the Countdown paper that was part of the kit, but don't worry if don't have that. You can use stickers, stamps, diecuts, or your good 'ole fashioned handwriting (it's just a number for heaven's sake!) Use a coordinating cardstock color, or another patterned paper (small, pale patterns or grids would work best, so you can see the numbers.) Then she just set about doing simple embellishments to each of the cards.
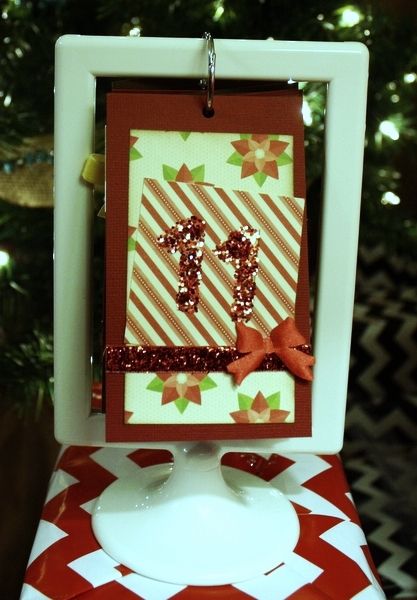
On this one, she glittered her number, used glitter velvet from the kit and the satin bow was also part of the kit.
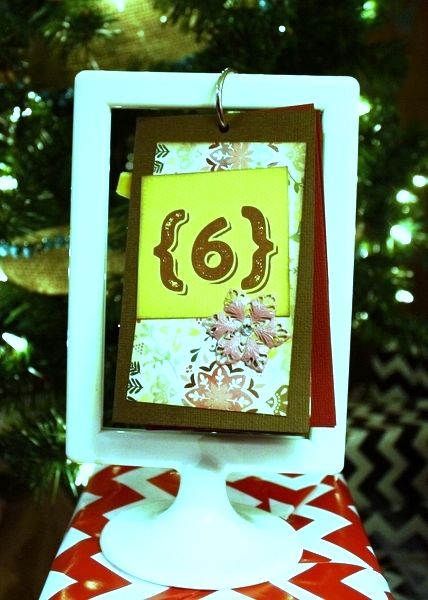
On this one, all she added was a metal snowflake, found in the kit.
Here, she's added a cookie cutter button, a length of gold velvet ribbon and a small brad - all from the kit.
For this one, she's simply added a sticker pennant from the kit.
You can embellish as much or as little as you want. Shoot dig through your stash and use up some bits and bobbles - this is a perfect project for that. Mix and match journaling cards from your stash into a kit to create the bases.
She punched holes through the cardstock backgrounds and strung all the cards on a round metal clip. I don't know what her base originally was, or is, but you can use a small picture frame, with the glass out and back off. Prop it up on a plate stand/easel that can be found in the framing department of almost any craft store. You could use a frame with chicken wire attached to the back and string, or clip the cards to the wire. You could just pin them to a bulletin board. Shoot you can tape them to the front of your 'fridge. A quick Pinterest search for Countdown Calendar Holders netted me this adorable DIY holder.
Counting down to something is fun and adds to the excitement, especially if you've got kids at home. So, go be creative. Use a kit. Dig out some stash. Track your progress.
Happy Thursday,



4 comments:
Thank you for featuring my countdown calendar! I use the tolsby frame from Ikea and a binder ring from the office supply store. I use these frames all the time at the parties I plan. They are so versatile. I have even seen them at Michaels recently but they are more expensive. Here is the link: http://www.ikea.com/us/en/catalog/products/30151035/
that is such a clever idea!!! I need one of those!!!
Thanks Kristin for the product link - it's super cute!
Wendi, I should have added if you're using it to track running or eating you could add notes of how long or far you ran to the cards. If it's food, you could put the recipe down.
Apparently my mind's got the ideas and they just aren't translating to my fingers. ;D
Post a Comment