Chipboard. Naked or dressed, it's quite the versatile embellishment. Like most versatile embellishments in my stash, I use them the way I use them. In other words, usually one of two ways and, therefore, I'm in a rut when it comes to my chipboard.
I've been going through my studio, which started as just a simple rearrange and has devolved into a sort and purge session of all my kits. And while I'm donating the paper to our school, the embellishment packs I'm setting aside (for the moment, anyway) which means I have more chipboard.
So, if I'm going to take on more stash, I need fresh (to me) ideas, 'cause ink and diamond glaze or naked shouldn't be all there is. I turned to my BFF, Pinterest, for ideas.
I don't have an embosser, but this is an awesome idea and may finally justify my need for one. Make a small grouping in the corner of a sheet of cardstock and build your layout. Spread them out and build layers on top using other embellishments. Use larger chipboard to make frames for photos, journaling and titles. That's not even mentioning cards.
My usual move with chipboard is paint, or using a stamp pad to apply ink, and diamond glaze (depending on how much time I have to allow for drying.) These examples show more than just the standard paint/ink that I don't think would take anymore time.
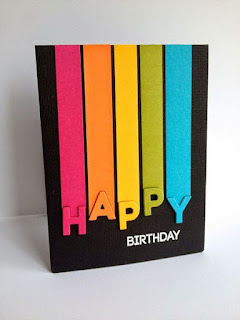
The card is an awesome, and easy, example. You could adapt this and use coordinating patterned paper to cover the letters and make the strips. You could paint the letters solid coordinating colors and mix in patterned paper. You could do glitter, instead of paint. Spell any number of things and drape down along the top of your page, up from the bottom, along the entire layout and put your photos over the middle, with the letters creating your title.
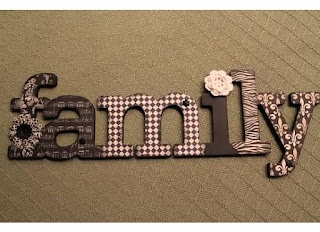
My other go to, depending on the chipboard, is patterned paper. I don't like messing with intricate chipboard being covered in paper, so simple shapes work for me for paper coverings. But, depending on the size of your chipboard, covering letters or shapes in coordinating paper can be totally doable, and then embellishing. Boom. Just keep in mind your scale - small chipboard, small patterns.
These wall hangings are wonderful. Do that same thing on your layout or card. Glue down your designs and paint or spray mist over it. Do a corner, a border or some random pattern.
Glitter. Simple and stunning. Use tacky glue, or even double sided tape - wrap the shape with your tape and apply glitter. Done.
I tell you, if I didn't have every kit I owned spread out in the basement in some aspect of being sorted, I'd be pulling out all my chipboard and playing.
Go. Create.


No comments:
Post a Comment